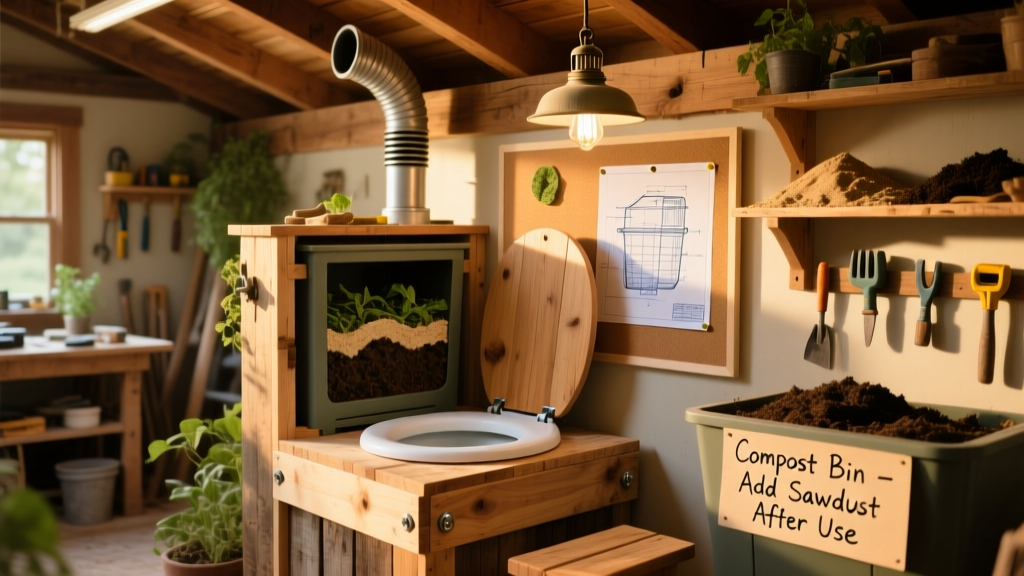
Building a DIY compost toilet is a practical, low-cost way to add sanitation to off-grid sites, backyard studios, or disaster-resilient homes—no plumbing or septic required. This project suits intermediate DIYers with basic carpentry and sealing skills; expect 12–16 hours of hands-on work over two weekends, plus 3–5 days for curing sealants before first use.
Project Overview
| Category | Details |
|---|---|
| Difficulty | Intermediate (requires precise sealing & ventilation setup) |
| Time Required | 12–16 hours active build + 4-day cure time |
| Estimated Cost | $280–$410 (varies by lumber grade & fan choice) |
| Tools Needed | Cordless drill, jigsaw, caulk gun, level, tape measure, safety glasses |
Tools & Materials
| Item | Qty | Notes | Cost |
|---|---|---|---|
| 1×12 pine boards (8 ft) | 4 | For box frame & lid — kiln-dried, S4S | $32 |
| ¾" plywood (2'×4') | 1 sheet | Base platform & divider panel | $24 |
| 12V exhaust fan (80 CFM min) | 1 | Broan 12V RV fan or Fantech RV-80 | $79 |
| Flexible 4" ducting + clamps | 6 ft | Aluminum-reinforced, UV-resistant | $22 |
| Compostable liner bags (13-gal) | 24 | 100% plant-based, ASTM D6400 certified | $36 |
| Carbon-rich bulking agent | 20 lb | Coconut coir or finished sawdust (not cedar) | $18 |
| Food-grade silicone sealant | 2 tubes | DAP Alex Plus, mold-resistant formula | $14 |
| Stainless steel hinges & latch | 1 set | Outdoor-rated, non-corrosive | $21 |
Step-by-Step Instructions
1. Cut and assemble the main box
Using your 1×12 boards, cut two 17"-long side panels, two 14"-long end panels, and one 14"×17" base. Pre-drill all screw holes, then assemble with #10 × 2½" exterior screws. Reinforce corners with 1½" galvanized corner braces. Leave the top open — this becomes the seating surface opening.
2. Install the divider and urine diverter
Cut the ¾" plywood into a 12"×14" divider panel. Mount it vertically 3" from the front edge using 1¼" screws — this creates separate chambers for solids and liquids. Attach a commercially available urine diverter (e.g., Nature’s Head OEM part) to the front lip, angled downward into a 1-gallon HDPE jug with tight-fitting lid. Seal all joints with food-grade silicone.
3. Build and mount the seat assembly
Use scrap ¾" plywood to cut a 14"×17" seat lid with a 10"×11" rectangular cutout centered for user access. Route the edges smooth, then attach heavy-duty stainless steel piano hinge along the back edge. Mount the lid to the box using countersunk screws. Add a magnetic latch at the front.
4. Wire and install the ventilation system
Drill a 4¼" hole in the rear panel, 2" below the top edge. Insert the fan housing, sealing the perimeter with silicone. Connect the fan to a 12V deep-cycle battery via an inline switch and 16-gauge stranded wire. Run ducting upward at least 36" above roofline (or through an exterior wall) — vertical rise prevents condensation backflow. According to the U.S. EPA’s 2023 Onsite Wastewater Guidelines, continuous airflow of ≥5 air changes/hour is critical to prevent anaerobic conditions and odors.
5. Line, fill, and test
Line the solids chamber with a compostable bag. Add 2 inches of coconut coir. Test urine flow into the jug — adjust diverter angle if needed. Let the unit run empty for 48 hours with the fan on to verify no drafts or leaks. Then add 1 cup of bulking agent after each solid use.
Tips & Common Mistakes
- Never use treated lumber inside the chamber — arsenic or copper leaching contaminates compost
- Avoid mixing urine and feces — separation reduces ammonia volatilization and pathogen risk
- If you smell ammonia, add more carbon (coir/sawdust) and check fan runtime — insufficient airflow is the #1 cause
- Wipe down the urine jug weekly with vinegar solution to prevent mineral buildup
"A well-managed compost toilet reduces pathogens by >99% within 6 months when maintained at 13°C+ and kept aerobic — but only if urine is fully diverted." — Dr. Sarah Kline, Composting Toilets: Science & Practice (University of Vermont Press, 2022)
Finishing Touches
Sand all exterior surfaces with 120-grit, then apply two coats of AFM SafeChoice Exterior Wood Stain (water-based, zero-VOC). Let dry 24 hours between coats. Seal the interior walls and lid underside with three coats of ECOS Wood Shield — a plant-based, food-safe sealant that blocks moisture wicking without off-gassing. Don’t paint or stain the chamber floor or divider — those surfaces need to remain porous for passive airflow.
How often do I empty the solids bin?
For one full-time user, replace the compostable bag every 3–4 weeks. For two users sharing intermittently (e.g., weekend cabin), expect 6–8 weeks per bag. Always wear nitrile gloves and a dust mask when handling — even aged compost may contain residual helminth eggs.
Can I use this in cold climates?
Yes — but keep the chamber above 10°C for active decomposition. In unheated sheds or cabins, wrap the box in 1" rigid foam insulation and locate it near a heat source (e.g., wood stove flue chase). Below 4°C, microbial activity slows dramatically; store filled bags in a rodent-proof outdoor compost pile until spring.
What’s the best bulking agent for beginners?
Coconut coir is ideal: pH-neutral, consistent texture, and high absorbency (holds 8× its weight in liquid). Avoid peat moss (non-renewable) or fresh wood chips (too slow to break down). Sawdust works if aged 6+ months and sourced from untreated hardwoods — learn how to age sawdust safely.
Do I need a permit?
Most rural counties allow compost toilets under alternative sanitation provisions — but always contact your local health department first. In Washington State, for example, Chapter 246-272A WAC requires third-party certification for permanent dwellings. Temporary structures (<120 sq ft) often fall under exemption thresholds — see state-by-state permit rules.
Can I compost the finished material in my garden?
Only after 12–18 months of thermophilic composting (≥55°C for 3+ days) and lab testing for E. coli and helminths. Most DIYers send mature compost to municipal green-waste facilities — find certified drop-off locations near you. Never use raw or partially processed material on food crops.
How do I clean the urine jug without splashing?
Use a dedicated 12" funnel with a flexible spout and pour diluted white vinegar (1:3) directly into the jug while holding it upright over a drain. Swirl gently for 30 seconds, then invert over a bucket to drain. Rinse twice with water. Store empty jugs upside-down on a wire rack to air-dry fully before reuse.
This compost toilet delivers real-world resilience — whether you’re prepping for grid-down scenarios or building sustainably on remote land. It’s quieter than a flush toilet, uses zero water, and turns waste into future soil fertility. Once you’ve built your first unit, you’ll see why off-grid builders call it the most empowering DIY bathroom project they’ve ever tackled.