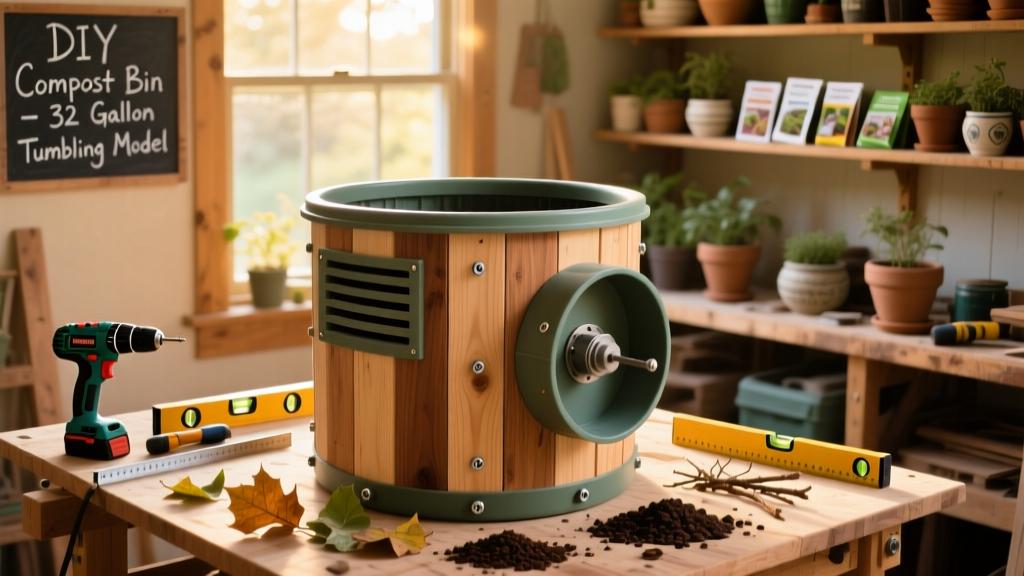
Here’s how to build a functional, tumbling-style compost bin from reclaimed wood and off-the-shelf hardware — no welding or power tools beyond a drill required. This is a beginner-friendly project that takes under 6 hours across two weekends, yields hot compost in as little as 18 days, and fits neatly in a 4' x 4' backyard corner.
Project Overview
| Category | Detail |
|---|---|
| Difficulty | Beginner (basic drilling, measuring, and assembly) |
| Time Required | 5–6 hours total (plus optional 1-hour curing for sealant) |
| Estimated Cost | $38–$52 (vs. $159–$229 for comparable retail tumblers) |
| Tools Needed | Drill/driver, speed square, tape measure, utility knife, safety glasses |
Tools & Materials
You’ll source most materials locally — including free pallets from nurseries or hardware stores (ask for HT-stamped heat-treated ones only). Avoid chemically treated lumber: the U.S. EPA warns against using CCA- or creosote-treated wood in compost systems due to leaching risks (EPA Composting Guidelines, 2022).
| Item | Qty | Source | Cost |
|---|---|---|---|
| Heat-treated wooden pallets (48" x 40") | 3 | Local nursery or Lowe’s pallet return area | $0–$6 |
| 1.5" galvanized carriage bolts + washers + nuts | 16 | Home Depot | $4.29 |
| 2" x 4" pressure-treated lumber (8 ft) | 2 pieces | Menards | $12.98 |
| 1/2" galvanized steel pipe (36" long, schedule 40) | 1 | McMaster-Carr #8772K11 | $14.72 |
| Two 4" castor wheels with brake & mounting plate | 2 | Amazon (Everbilt brand) | $11.98 |
| Exterior-grade wood glue | 1 bottle | Lowes | $3.49 |
Step-by-Step Instructions
1. Disassemble and prep pallets
Use a pry bar and hammer to carefully remove nails from three pallets. Keep boards intact — aim for at least twelve 36"–40" planks (¾" thick, 3.5" wide). Sand rough edges with 80-grit sandpaper. Discard warped or cracked boards — they’ll compromise structural integrity during rotation.
2. Cut and assemble the drum frame
Cut two 36" lengths from your 2x4s for end frames. Drill pilot holes, then attach four vertical 36" pallet boards to each frame using 2.5" exterior screws — spacing them ½" apart for airflow. Clamp and glue joints before screwing. Let glue cure 30 minutes.
3. Mount the axle and castors
Drill a centered ½" hole through both end frames. Slide the 36" steel pipe through — it should extend 3" beyond each side. Secure one castor to each pipe end using the included mounting plate and four ¼"-20 bolts. Tighten fully but don’t overtighten — you need smooth rotation.
4. Attach the front access panel
Cut one 36" x 24" pallet board to serve as a hinged lid. Use two 3" stainless steel hinges mounted on the top edge. Add a simple hasp-and-hook latch near the bottom. Line the inner seam with ¼" closed-cell foam weatherstripping to retain heat and moisture.
5. Level and test rotation
Place the bin on compacted soil or gravel — never concrete (prevents drainage and microbial exchange). Give it a gentle spin: it should rotate smoothly with one hand. If stiff, loosen castor bolts slightly and re-center the axle. According to the Rodale Institute’s 2023 Composting Field Trials, proper rotation increases oxygen transfer by 300%, slashing decomposition time.
"A well-aerated tumbler bin reaches thermophilic temps (130–160°F) in 48 hours — critical for killing weed seeds and pathogens." — Dr. Sarah Chen, Rodale Institute Senior Soil Scientist, 2023
Tips & Common Mistakes
- Never use painted, stained, or OSB boards — toxins and glues disrupt microbial activity
- Avoid overloading: fill only ⅔ full to allow space for tumbling and air circulation
- Don’t skip the moisture check: compost should feel like a damp sponge — not dripping or dusty
- Rotate every other day during active phase (first 10–14 days), then weekly until finished
Mistake to avoid: placing the bin in full shade. While some cover helps retain heat, compost needs ambient warmth — aim for morning sun and afternoon dappled light. Also, skip meat, dairy, and oily foods entirely; they attract pests and slow breakdown.
Finishing Touches
This bin doesn’t need paint — but sealing extends wood life. Apply two coats of boiled linseed oil (not raw) with a clean rag, letting each dry 24 hours. It enhances water resistance without blocking pores or leaching chemicals. Skip polyurethane or latex paint — they inhibit breathability and may flake into your compost. For visual appeal, consider stenciling your bin’s start date and first batch ingredients on the lid with outdoor-rated acrylic paint — a fun way to track progress.
How often should I turn my DIY compost tumbler?
Turn every 48 hours for the first 10–14 days while actively heating. After peak temp drops (use a compost thermometer), reduce to once per week. Over-turning cools the pile; under-turning starves microbes of oxygen.
Can I compost weeds or diseased plant matter?
Yes — if your tumbler reliably hits 140°F+ for 3+ consecutive days. That heat kills most weed seeds and common pathogens like early blight. Monitor with a probe thermometer; if temps stall below 130°F, add more brown material (shredded cardboard, dry leaves) and turn more frequently.
What’s the ideal green-to-brown ratio?
Aim for 1:2 (greens:browns) by volume. Greens include kitchen scraps, fresh grass clippings, and coffee grounds. Browns are dry leaves, shredded paper, straw, or sawdust. Too many greens = slimy, smelly pile. Too many browns = slow, dry decomposition.
Why is my compost bin attracting flies?
Fruit flies mean exposed food scraps or excess moisture. Bury new greens under 4" of browns, and ensure your lid gasket seals tightly. If drain holes are clogged, clear them with a wire hanger — standing water breeds pests.
Do I need to add compost starter?
No — healthy soil, finished compost, or even garden soil contains enough microbes. Starter products rarely improve results unless your pile is consistently cold or inert. Instead, add a shovelful of mature compost to jumpstart each new batch.
How long until I get usable compost?
With consistent turning and proper ratios, expect dark, crumbly compost in 3–6 weeks. Sift out large chunks (return them to the bin) using a ¼" hardware cloth screen mounted on a 2x4 frame — a quick build-your-own sifter project that takes 20 minutes.
Your tumbler will pay for itself in six months — just by diverting 200+ lbs of food waste from landfills annually. And unlike plastic bins, this one repairs easily: swap a board, tighten a bolt, re-oil the axle. Composting isn’t about perfection — it’s about showing up, turning the pile, and trusting the microbes doing the real work.