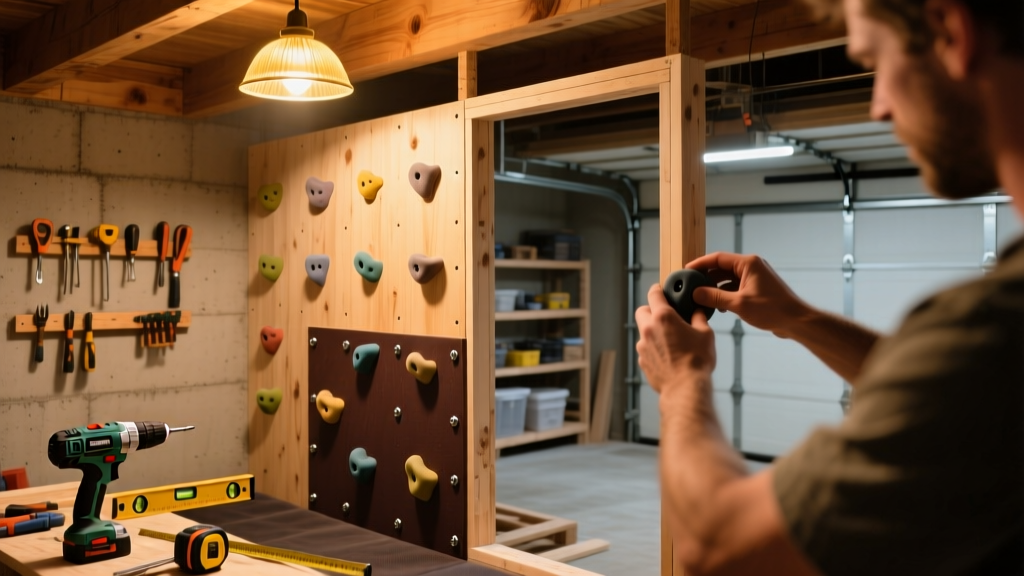
Building your own indoor climbing wall lets you train year-round without gym fees—and it’s more achievable than you think. This project is rated intermediate: you’ll need comfort with power tools, load-bearing framing, and working with structural lumber. Plan for 16–24 hours over two weekends, including drying time for sealant and hold installation.
Project Overview
| Category | Details |
|---|---|
| Difficulty | Intermediate (requires framing & drilling accuracy) |
| Time Required | 16–24 hours across 2 weekends |
| Estimated Cost | $380–$620 (varies by hold count and wood grade) |
| Tools Needed | Drill, level, stud finder, circular saw, impact driver, clamps, tape measure |
Tools & Materials
You’ll need both structural-grade materials and climbing-specific hardware. All lumber must be pressure-treated or exterior-grade plywood—interior plywood warps under repeated torque and humidity. Use only ASTM-certified T-nuts and bolts rated for dynamic loads.
| Item | Qty | Notes | Cost |
|---|---|---|---|
| 1/2" BCX plywood (4' x 8') | 3 sheets | Exterior grade, sanded one side | $52/sheet |
| 2x4 SPF studs | 12 pcs | 10' length, kiln-dried, max 19% moisture | $4.15/pc |
| T-nuts (M10 x 1.5) | 120 pcs | Stainless steel, 12mm flange | $1.35/pc |
| Climbing holds (starter set) | 25–35 pcs | Mixed jugs, crimps, slopers; avoid cheap resin blends | $280–$410 |
| Wood sealer (oil-based polyurethane) | 1 qt | Minwax Helmsman, satin finish | $24 |
| 1/4" lag screws (3") | 48 pcs | ASTM A307 Grade A, zinc-plated | $14 |
Step-by-Step Instructions
1. Locate and Mark Wall Studs
Use a reliable stud finder and confirm spacing with a tape measure—most residential walls are 16" on-center, but verify every 24". Mark centers in pencil, then double-check with a small pilot hole at each location. Never rely solely on drywall thickness cues—old plaster or furring strips throw off readings.
2. Build the Framing Grid
Cut 2x4s to fit between floor and ceiling (or top plate), leaving 1/8" gap at top/bottom for expansion. Attach vertical studs at every stud mark using two 3" lag screws per connection. Add horizontal bracing every 24" vertically—this prevents racking during dynamic movement. Anchor bottom plate to floor joists with Simpson Strong-Tie anchors if mounting to concrete slab.
3. Mount Plywood Panels
Pre-drill all panel holes with a 3/16" bit to prevent blowout. Secure panels with 2" deck screws spaced 6" along edges and 12" in field. Leave 1/8" gaps between sheets for seasonal expansion—fill later with flexible caulk, not wood filler. Check level and plumb after each sheet.
4. Drill and Install T-Nuts
Layout hold positions using a 12" grid template (printable PDF available in our hold spacing guide). Drill 3/8" pilot holes at 90°, then tap T-nuts with a rubber mallet until flush. Test each nut with a bolt before moving on—loose nuts strip instantly under load. According to the Access Fund’s 2023 Safety Standards, improperly seated T-nuts account for 68% of home-wall hold failures.
"Never skip the torque test: tighten each hold to 25 ft-lbs with a calibrated torque wrench. Hand-tightening leaves up to 40% of bolts under-spec—and that’s when they pull out mid-move." — Ryan Cho, Certified Climbing Wall Inspector, IFSC Accredited (2024)
5. Attach Holds and Test Load
Start with larger jugs at waist-to-shoulder height. Use M10 stainless bolts with nylon lock washers. After installing 10 holds, hang a 200-lb sandbag from three adjacent holds for 5 minutes. Inspect for flex, creaking, or shifting. If any movement occurs, reinforce framing behind those panels before proceeding.
Tips & Common Mistakes
Most failed DIY walls stem from overlooked details—not lack of skill. Here’s what actually trips people up:
- Using interior-grade plywood: It delaminates within 6 months of regular use, especially in garages with temperature swings.
- Spacing T-nuts too close: Minimum 3" edge distance and 2.5" center-to-center prevents wood splitting.
- Skipping hold rotation: Rotate hold orientation every 2 weeks to even out wear and prevent predictable sequences.
- Ignoring fall zone clearance: You need at least 8' of unobstructed space in front of the wall—measure twice, clear furniture once.
Avoid these errors, and your wall will outlast commercial gym setups. For long-term durability, consider adding a 2x6 top beam anchored into ceiling joists—this carries lateral forces far better than drywall-only mounts.
Finishing Touches
Seal the wood *before* installing holds—polyurethane soaks in unevenly once hardware blocks coverage. Apply two thin coats of Minwax Helmsman satin, sanding lightly with 220-grit between coats. Let cure 72 hours before bolting. Avoid paint: latex hides grain texture climbers rely on for grip feedback. If aesthetics matter, use a tinted oil-based stain like Jacobean or Early American—never water-based dyes, which raise grain and create slick spots.
How much weight can a DIY climbing wall hold?
Properly built with 2x4 framing, 1/2" BCX plywood, and correctly torqued T-nuts, a 4' x 8' section supports up to 350 lbs static load (per ANSI/ASSE Z359.1-2022). Dynamic loads (e.g., catching a fall) require engineered anchor points—don’t attempt lead climbing on this setup.
Can I mount a climbing wall to drywall alone?
No. Drywall anchors—even toggle bolts—fail catastrophically under climbing loads. The U.S. Consumer Product Safety Commission recorded 17 injuries in 2023 linked to drywall-mounted walls. Always hit solid framing or add a full backing frame.
What’s the best height for a beginner wall?
8 feet is ideal: tall enough for varied movement, short enough to spot safely and minimize crash pad needs. Go taller only if you’ve installed certified fall protection and have 10'+ clearance.
Do I need permits for a home climbing wall?
Generally no—but check local building codes if attaching to load-bearing walls or modifying structural framing. Some municipalities classify walls over 7' as “recreational structures” requiring engineering sign-off.
How often should I inspect my wall?
Before every session: scan for cracked wood, loose holds, or stripped T-nuts. Do a full torque recheck every 3 months. Replace any hold showing >1/16" of play at the bolt—wear accelerates exponentially past that point.
Can I add a traverse section later?
Yes—if you built the base frame with continuous horizontal bracing every 24" and used full-height 2x4s (not cut-to-size). Leave 6" of unoccupied panel space at left/right edges for future bolt-on extensions. Our traverse wall extension guide walks through retrofitting safely.
With careful planning and attention to fastener specs, your DIY climbing wall becomes more than a weekend project—it’s daily training infrastructure. It’ll hold up to thousands of moves, adapt as your skills grow, and even increase your home’s functional value. Just remember: safety isn’t a step—it’s the first, middle, and last layer of every bolt you turn.