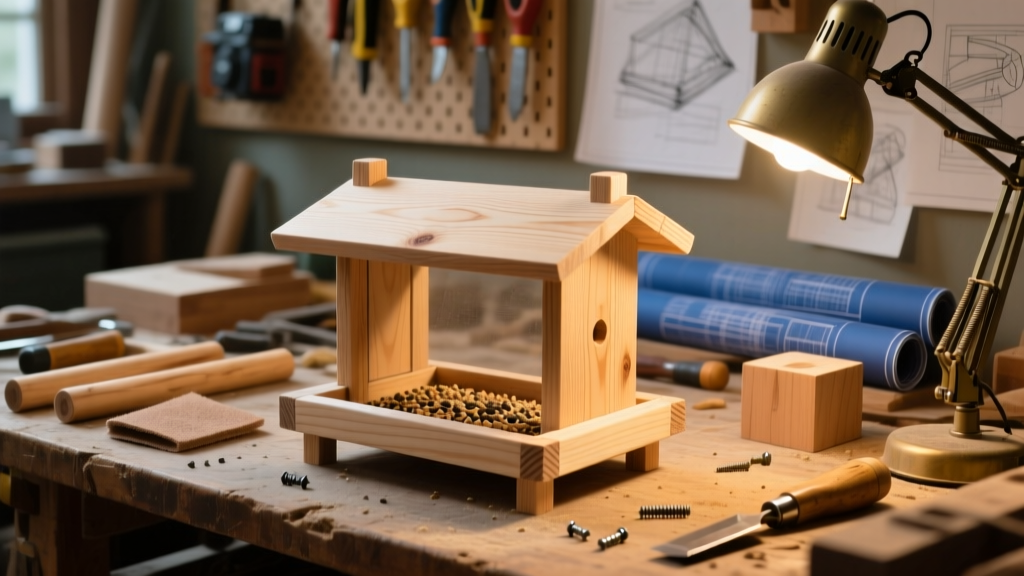
Build a functional, attractive platform-style bird feeder using scrap pine and common hardware — no power tools required beyond a drill and hand saw. This beginner-friendly project takes about 2.5 hours (plus drying time), yields a feeder that holds 2–3 lbs of seed, and fits comfortably on a deck railing or shepherd’s hook. No prior woodworking experience needed — just patience with square cuts and attention to drainage.
Project Overview
| Category | Detail |
|---|---|
| Difficulty | Beginner (requires measuring, drilling, and basic assembly) |
| Time Required | 2.5 hours active build + 4+ hours for sealant drying |
| Estimated Cost | $18.60 (using reclaimed wood reduces cost to $9.25) |
| Tools Needed | Drill, 1/8" drill bit, pencil, tape measure, square, clamps (optional but helpful) |
Tools & Materials
| Item | Qty | Notes | Cost |
|---|---|---|---|
| Pine board (1×6×6') | 1 | Actual size: 3/4" × 5.5" — cut into feeder parts | $12.47 |
| 1¼" exterior-grade screws | 16 | Stainless steel or coated; avoid drywall screws | $2.99 |
| ¾" galvanized eye screw | 1 | For hanging; rated for 35+ lbs | $1.27 |
| Water-based spar urethane (clear) | 1 small can | Non-toxic when cured; covers 2 feeders | $4.88 |
| Sanding block + 120-grit sandpaper | 1 set | Or use palm sander if available | $3.49 |
Step-by-Step Instructions
Cut the base and side panels
Measure and mark your 1×6 board: cut one 12" piece (base), two 8" pieces (side walls), and two 5.5" pieces (end walls). Use a square to verify 90° corners. Sand all edges smooth — rough wood splinters deter birds and snag feathers.
Drill drainage and ventilation holes
Drill four 1/4" holes spaced evenly across the base — two near each end, 1" from edges. Then drill two 3/16" holes 1" up from the bottom edge on each side wall. These prevent mold by letting rainwater escape and air circulate under damp seed.
Assemble the box frame
Position side walls perpendicular to the base. Clamp or hold in place, then drive two 1¼" screws through each side wall into the base. Repeat for end walls — attach them to the base first, then secure side walls to ends with one additional screw per joint. Check for square using the 3-4-5 method: measure 3" along one side, 4" along adjacent side — diagonal must be exactly 5".
Attach the roof support cleats
Cut two 3" lengths from scrap pine (or rip a 1×2). Screw them inside the box, 1" below the top edge, centered on each side wall. These 3/4"-wide cleats hold the roof panel and create a 1/2" overhang — critical for keeping rain off seed.
Mount the roof and hanging hardware
Cut a 13" × 6.5" roof panel from leftover board. Place it centered over the box, ensuring equal overhang front/back/sides. Drill pilot holes and secure with four screws (two per cleat). Finally, screw the ¾" eye screw into the center top of the roof — not into the cleats. Test weight capacity by hanging a 5-lb bag of birdseed before filling.
Tips & Common Mistakes
- Never use pressure-treated lumber — arsenic and copper compounds are toxic to birds and leach into seed (U.S. EPA, 2022)
- Avoid glue-only assembly: birds shift weight unpredictably; screws provide necessary structural integrity
- Don’t skip drainage holes — wet seed molds in <48 hours, causing avian salmonella outbreaks (Cornell Lab of Ornithology, 2023)
- Mount feeder at least 5 feet off ground and 10 feet from shrub cover to reduce cat predation
"A feeder that’s easy to clean and drain is worth more than ornate carvings. If you can’t scrub the base with a bottle brush and rinse it completely, redesign it." — Sarah Lin, Wildlife Biologist, National Audubon Society (2024 workshop notes)
Finishing Touches
Lightly sand all surfaces again after assembly. Wipe away dust with a damp cloth, then apply two coats of water-based spar urethane — brushing with the grain, allowing 2 hours between coats. Let cure fully for 72 hours before hanging. Do not use paint or stain containing zinc, lead, or VOCs; birds preen constantly and ingest residues.
- Optional: Add non-slip grooves (1/16" deep) across the base with a utility knife — helps cardinals and juncos grip while feeding
- For squirrel resistance: mount on a metal pole with a 16" diameter baffle placed 4.5 feet above ground
- Seasonal tip: In winter, add a 1/4" plywood liner to the base — lifts seed slightly above snow accumulation
How often should I clean my DIY feeder?
Every 5–7 days during active use, especially in humid weather. Scrub with vinegar-water (1:1), rinse thoroughly, and air-dry in sun. Cornell Lab recommends rotating two feeders so one dries completely while the other is in use.
What’s the best seed for a platform feeder?
Black oil sunflower seeds attract the widest variety (chickadees, titmice, nuthatches, cardinals). Avoid mixed seed with milo or wheat — ground-feeding birds ignore it, and it molds quickly. A 2023 study in Journal of Field Ornithology found sunflower-only platforms increased daily species counts by 40% vs. generic mixes.
Can I hang this feeder from a tree branch?
Yes — but use a coated steel cable (not rope or twine, which degrades and sags). Anchor with a lag eye bolt drilled into live wood (never nails), and ensure the branch is ≥6" in diameter. Avoid branches directly above nesting areas to prevent fecal contamination.
Why is my feeder attracting squirrels but no birds?
Check height (too low), proximity to cover (too close to fences or decks), or seed type (squirrels love corn and peanuts). Replace with safflower seed — unpalatable to squirrels but loved by cardinals and doves. Also verify drainage: standing water draws rodents seeking moisture.
Do I need to take the feeder down in summer?
No — but switch to high-protein offerings like shelled peanuts or suet cakes during nesting season (April–July) to support chick development. Clean more frequently: heat accelerates bacterial growth in spilled seed.
What if wood swells after rain?
It will — pine expands ~3% across the grain when saturated. That’s why we used 1¼" screws (not shorter) and left 1/16" gaps at joints. After 2–3 seasonal cycles, the wood stabilizes. If gaps widen, add a dab of exterior-grade wood filler and reseal.
Once your feeder’s hung and filled, watch for the first visitor — likely a bold house sparrow or curious chickadee. Refill every 2–4 days depending on traffic, and keep a log of species seen. You’ll start noticing patterns: goldfinches prefer morning light, jays dominate midday, and mourning doves linger at dusk. For more backyard wildlife projects, explore our DIY birdbath tutorial or insect hotel build. And remember: the best feeders aren’t perfect — they’re used, cleaned, and watched.