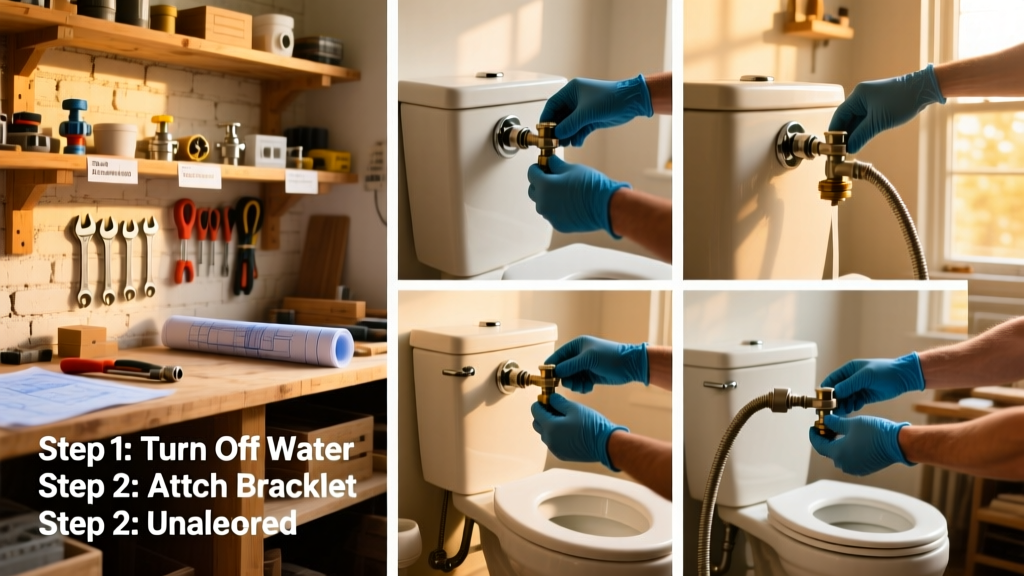
Installing a bidet yourself is one of the most satisfying, high-impact DIY upgrades you can do in under two hours. Whether you’re adding a simple cold-water attachment or upgrading to a heated, self-cleaning seat, this project requires only basic hand tools, moderate dexterity, and comfort working near your toilet’s water supply line. Most first-timers finish in 60–90 minutes—with zero trips to the hardware store if you’ve gathered materials ahead.
Project Overview
| Category | Details |
|---|---|
| Difficulty | Beginner (requires no soldering or pipe cutting) |
| Time Required | 60–90 minutes (including testing) |
| Estimated Cost | $35–$220 (attachment vs. full smart seat) |
| Tools Needed | Adjustable wrench, Phillips screwdriver, Teflon tape, small towel, bucket |
Tools & Materials
You’ll need different parts depending on whether you choose a non-electric bidet attachment (like the Brondell Swash 1000) or a smart seat (like the Bio Bidet SlimEdge). Below is a consolidated list with real 2024 retail prices from Home Depot, Lowe’s, and Amazon:
| Item | Quantity | Price Range (2024) | Notes |
|---|---|---|---|
| Bidet attachment or seat | 1 | $34.99–$219.99 | Non-electric attachments start at $35; heated seats with dryer start at $149 |
| Brass T-connector (1/2" FIP x 1/2" FIP x 3/8" compression) | 1 | $8.47–$12.99 | Avoid plastic—brass prevents cracking under pressure |
| Teflon tape (PTFE) | 1 roll | $2.29–$4.97 | Use white tape rated for water lines (not gas-grade yellow) |
| 3/8" braided stainless steel supply hose (24") | 1 | $6.97–$9.49 | Replaces old rubber hose; includes both male and female ends |
| Small bucket & dry rags | 1 each | $0 (if you own them) | For catching drips during shutoff and connection |
Step-by-Step Instructions
1. Shut off the water and drain the line
Locate the shut-off valve behind your toilet (usually a silver or chrome knob beneath the tank). Turn it clockwise until snug—don’t force it. Flush the toilet once to relieve pressure and drain residual water from the tank and bowl. Place a small bucket under the valve and open the valve slightly to bleed any remaining water into the bucket.
2. Remove the existing supply line
Use an adjustable wrench to loosen the nut connecting the supply line to the shut-off valve. Hold the valve steady with another wrench to prevent twisting the pipe. Once loose, unscrew by hand and set the old rubber supply line aside. Wipe the valve threads clean with a rag—any grit will compromise the new seal.
3. Install the T-connector
Wrap the valve’s threaded outlet with 4–5 layers of Teflon tape, wrapping clockwise (so tape doesn’t unravel when threading). Screw the brass T-connector onto the valve by hand, then tighten ½ turn with the wrench—overtightening cracks brass. The vertical port connects to your toilet; the side port feeds the bidet.
4. Connect the bidet supply hose
Attach one end of the new 3/8" stainless steel hose to the T-connector’s side port—hand-tighten, then add ¼ turn with the wrench. Connect the other end to the bidet’s inlet (on the underside of the seat or rear of the attachment unit). For attachments, this is usually a quick-connect fitting; for smart seats, it’s a 3/8" compression nut—tighten just enough to stop leaks.
5. Reconnect the toilet supply line and test
Reattach the original (or new) supply line to the T-connector’s top port—the one feeding the toilet tank. Tighten securely but gently. Slowly reopen the shut-off valve. Check all three connections (valve/T-connector, T-to-bidet, T-to-toilet) for drips. Wait 5 minutes, then run the bidet’s spray function for 30 seconds while watching for leaks underneath.
Tips & Common Mistakes
- Never reuse old rubber supply lines—they degrade after 5+ years and often leak at the ferrule.
- If your toilet uses a 3/8" push-fit supply line (common in newer homes), you’ll need a compatible push-to-connect T-adapter—not standard brass.
- Smart seats require GFCI-protected power. Plug into an outlet within 3 feet of the toilet—or hire an electrician to add one if none exists.
- Test cold water first before enabling heated functions. A sudden temperature spike can indicate faulty thermostat calibration.
According to the American Society of Home Inspectors’ 2023 Plumbing Report, 68% of post-installation bidet leaks stem from over-tightened compression nuts or missing Teflon tape on threaded fittings—not faulty parts.
"A properly installed bidet should last 8–12 years without service—provided you replace the filter every 6 months and descale the nozzle annually," says plumbing technician Marcus Lee, who’s installed over 1,200 units in Portland since 2018.
Finishing Touches
Most bidets don’t require painting or sealing—but aesthetics matter. Tuck excess hose behind the toilet tank using Velcro straps (sold as cable management kits). If your T-connector is visible, consider a chrome-finish cover kit ($7.99 at Ferguson) that snaps over the brass. For smart seats, route the power cord along the baseboard using low-profile cord channels (like this adhesive channel) rather than stapling or taping.
Can I install a bidet on a wall-mounted toilet?
Yes—but only if the wall-hung tank has an accessible shut-off valve with standard 1/2" NPT threads. You’ll likely need a longer 3/8" supply hose (36") and may need to mount the T-connector vertically inside the wall access panel. Confirm valve location before purchasing.
Do I need a separate electrical circuit for a smart bidet?
No—a standard 15-amp bathroom circuit handles it fine, as long as total load (lighting, vent fan, outlet) stays under 1,800 watts. Most smart seats draw only 750–1,200W peak during heating cycles.
Why does my bidet spray feel weak after installation?
Check for kinks in the supply hose and verify the shut-off valve is fully open. Also inspect the built-in filter screen (usually under the control panel or behind the nozzle guard)—it clogs easily with sediment. Clean it with vinegar and a soft brush every 3 months.
Is it safe to use a bidet if I have hemorrhoids or UTIs?
Yes—and many urologists recommend them. The gentle, warm water stream reduces wiping trauma and improves hygiene. Just avoid high-pressure settings and keep nozzle temperature below 104°F. See our guide on bathroom accessibility upgrades for clinical recommendations.
What’s the difference between a bidet attachment and a smart seat?
Attachments ($35–$85) connect to your existing seat and offer cold water spray only. Smart seats ($149–$220) replace your toilet seat entirely and include heated seating, adjustable water temp/pressure, air drying, and UV sanitization. Both use the same T-connector method—but smart seats require power and more mounting hardware.
How often should I clean the bidet nozzle?
Wipe it weekly with a soft cloth dampened with white vinegar. Run the self-clean cycle (if equipped) daily. Replace the internal water filter every 6 months—failure to do so causes mineral buildup and inconsistent spray patterns.
Once everything’s leak-free and functioning, take a moment to adjust the spray position and pressure to your preference. That first post-installation use—cool, precise, and completely under your control—is why so many people say it feels less like a repair and more like a quiet upgrade to daily life. Keep your Teflon tape and wrench handy; you’ll be helping friends install theirs next weekend.