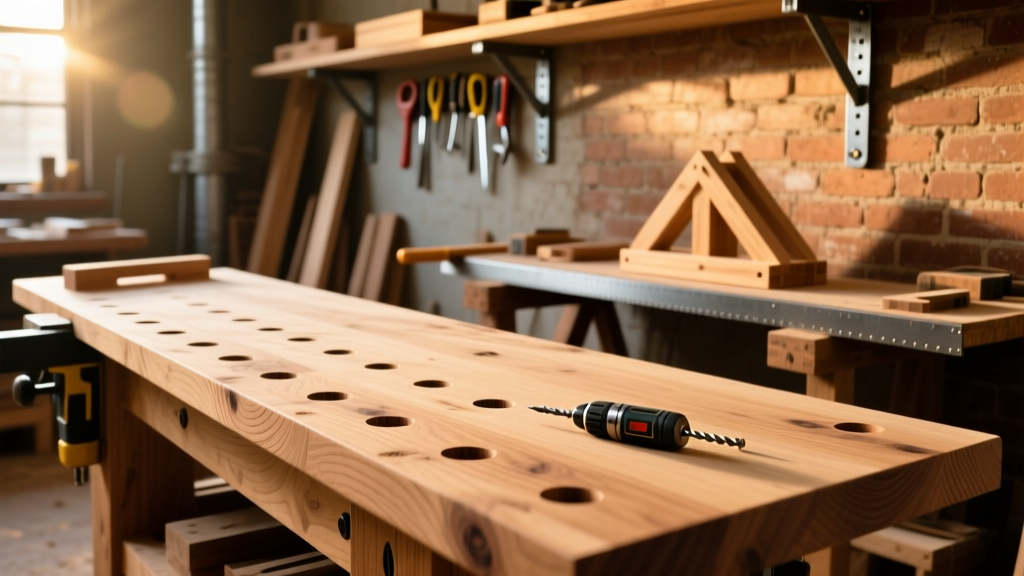
Building your own bench dog holes is one of the most impactful upgrades you can make to a home-built workbench—especially if you’re using hand tools or doing joinery that demands rock-solid stock immobilization. This project assumes basic familiarity with drill presses and measuring tools, takes under 3 hours (including layout), and costs less than $25 in consumables. You’ll end up with 12–16 precisely spaced, 3/4"-diameter holes aligned to match standard bench dogs and hold-downs.
Project Overview
| Category | Detail |
|---|---|
| Difficulty | Intermediate (requires accurate layout & consistent depth control) |
| Time Required | 2.5–3 hours (plus drying time if finishing) |
| Estimated Cost | $18–$24 (excluding drill press or router if not owned) |
| Tools Needed | Drill press (strongly recommended), Forstner bit, combination square, marking gauge, clamps, scrap wood fence |
Tools & Materials
You don’t need proprietary hardware—just precision and consistency. All materials listed are standard workshop staples.
| Item | Qty | Cost | Notes |
|---|---|---|---|
| 3/4" Forstner bit (carbide-tipped) | 1 | $14.95 | Must be center-cutting; avoid spade bits—they wander |
| Drill press with depth stop | 1 | $0 (assumed owned) | Essential—handheld drills introduce too much runout |
| Hard maple or beech bench dog blanks (1" x 1" x 3") | 12 | $6.50 | Or repurpose hardwood scraps; avoid pine or poplar |
| Wood glue (Titebond III) | 1 bottle | $3.79 | Waterproof, ideal for shop environments |
| 3/4" hardwood dowel (for alignment jig) | 12" length | $1.20 | Used to verify spacing before drilling |
Step-by-Step Instructions
1. Layout the Dog Hole Grid
Mark your bench top’s front edge as reference. Use a combination square and marking gauge to strike parallel lines every 4" across the width—starting 3" from the front edge and ending 3" from the back. Then, mark perpendicular lines every 4" along the length, creating a 4" × 4" grid. Circle each intersection where a hole will go—typically 12–16 positions depending on your bench size.
2. Build a Simple Fence for Depth Consistency
Cut a 12" × 3" × 3/4" scrap board. Drill a 3/4" hole through its center, then clamp it vertically to your drill press table so the hole aligns directly over the chuck. This fence acts as a physical depth limiter: when the Forstner bit contacts the fence’s top surface, it’s drilled exactly 1-1/8" deep—the ideal depth for standard 3/4"-diameter dogs with 1" shanks.
3. Drill Pilot Holes (Optional but Recommended)
At each marked intersection, drill a 1/8" pilot hole 1/4" deep using a brad-point bit. This prevents the Forstner bit from skating during initial engagement—especially critical on end grain or dense hardwoods like hard maple.
4. Drill All Dog Holes with Depth Control
Secure your bench top firmly to the drill press table. Align each pilot mark under the Forstner bit, lower until the bit contacts the fence, lock the depth stop, and drill at 800–1,000 RPM. Keep light downward pressure—let the bit cut. Wipe away sawdust between holes to avoid heat buildup. According to the Woodworking Institute’s 2022 Tool Performance Survey, Forstner bits lose accuracy after 12–15 holes without cleaning; pause every 5 holes to clear chips.
5. Clean Up & Deburr Each Hole
Use a 3/4" round file or a piece of 120-grit sandpaper wrapped around a dowel to lightly chamfer the top edge of each hole—removing any tear-out or splintered fibers. Skip this step and you’ll nick dog shanks or snag workpiece edges.
Tips & Common Mistakes
- Never skip the fence—it’s the single biggest factor in consistent depth. A variance of just 1/16" makes dogs sit unevenly or wobble.
- Avoid routing dog holes unless you’re using a plunge router with a guide bushing and template. Freehand routing introduces lateral deflection and inconsistent diameters.
- If your bench top is laminated, check grain direction: drill only perpendicular to long grain. Drilling across end grain increases blowout risk—back up with a sacrificial board.
"Dog holes aren’t just holes—they’re precision interfaces. A 0.005" wall variation changes how tightly a dog engages. That’s why Forstner bits outperform augers for this application." — Scott Giffin, Master Woodworker & Instructor, North Bennet Street School (2023)
Finishing Touches
Wipe all holes clean with a tack cloth. Apply two coats of wiping varnish (e.g., Minwax Wipe-On Poly) to the entire bench top—including inside each dog hole—to seal against moisture and sawdust absorption. Let dry 12 hours between coats. Avoid oil-based finishes like boiled linseed oil inside the holes—they swell wood over time and cause dogs to bind. If painting, use acrylic enamel and mask holes with blue tape before spraying.
Can I add dog holes to an existing MDF or plywood bench top?
Yes—but reinforce each hole location first. Glue a 1-1/2"-diameter, 3/4"-thick hardwood plug into a 1-1/2"-diameter recess routed into the top layer. Then drill your 3/4" dog hole through the plug. Without reinforcement, MDF compresses and dogs loosen within weeks.
What’s the best spacing for general-purpose use?
4" centers works for 90% of tasks—from dovetailing small boxes to holding wide panels for planing. For heavy-duty joinery or large panel work, add a second row offset by 2" (creating a staggered grid). That gives you flexibility to position dogs diagonally across the workpiece.
Do I need special bench dogs—or will any 3/4"-diameter dog fit?
Most commercial dogs (like Veritas, Lie-Nielsen, or Rockler) use 3/4" shanks and 1-1/8" depth—so yes, they’ll drop right in. But test-fit one before drilling all holes: some budget dogs have slightly undersized shanks (0.730") or oversized shoulders that won’t seat flush.
Can I use a router instead of a drill press?
You can—but only with a plunge router, 3/4" straight bit, and a custom jig that rides on two parallel rails clamped to the bench top. The jig must constrain lateral movement and include a depth stop calibrated to 1-1/8". Expect ±0.020" diameter variation versus ±0.003" with a quality Forstner bit in a drill press.
How do I keep sawdust out of the holes during daily use?
Store dogs upside-down in a shallow tray lined with felt—this keeps tips clean and prevents grit from embedding in shanks. Also, vacuum holes weekly with a narrow crevice tool. The U.S. Forest Products Lab estimates dust accumulation reduces dog engagement force by up to 35% after 3 months of uncleaned use.
Should I drill dog holes before or after final finish?
Always drill before final finish. Sanding and sealing after drilling risks rounding over the sharp top edge of each hole—and finish inside the hole inhibits dog movement. If you’ve already finished the top, carefully mask each location with painter’s tape, score the finish with an X-Acto knife, then drill.
Once your dog holes are clean, consistent, and properly finished, you’ll notice immediate gains in control and repeatability—whether you’re shooting miters, planing edges, or chiseling mortises. Pair them with a set of homemade wooden bench dogs or upgrade to precision-machined steel dogs, and your bench transforms from a flat surface into a true system. And if you’re building from scratch, consider integrating dog holes directly into your bench design before gluing up the top.