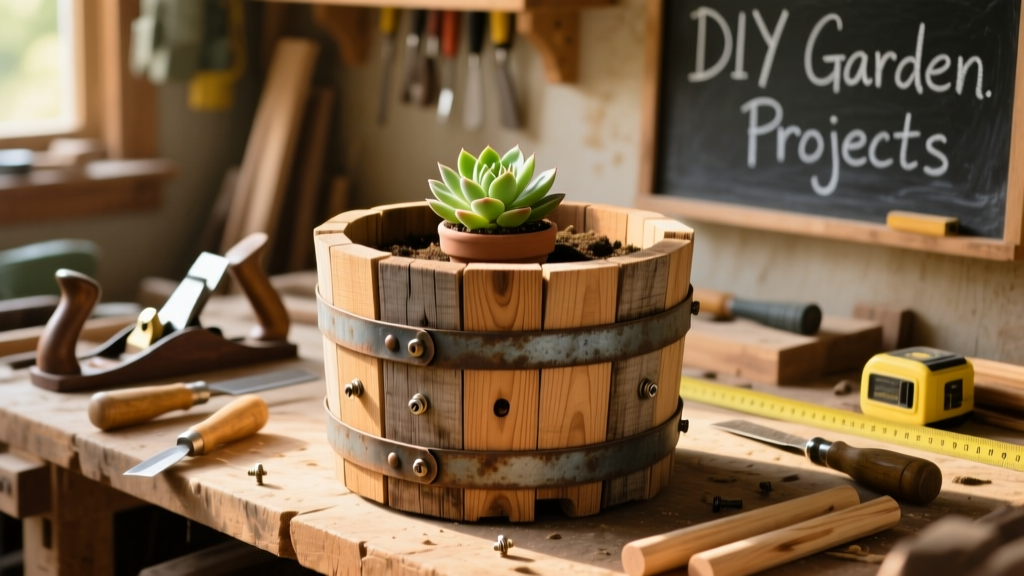
Building a DIY barrel planter is a satisfying weekend project that transforms a weathered oak barrel into a striking, functional garden centerpiece. It’s beginner-friendly—no joinery or power tool mastery required—and takes about 2.5 hours from start to soil. You’ll gain confidence working with reclaimed wood while creating a planter that drains well, resists rot, and adds instant rustic charm to patios or entryways.
Project Overview
| Category | Details |
|---|---|
| Difficulty | Beginner (basic drilling & measuring skills) |
| Time Required | 2.5–3.5 hours (plus optional 24-hour drying time for sealant) |
| Estimated Cost | $42–$78 (depends on barrel source and finish choice) |
| Tools Needed | Drill, 1/4" drill bit, jigsaw or reciprocating saw, tape measure, level, safety glasses, work gloves |
Tools & Materials
You can source barrels affordably—or even free—from local distilleries, wineries, or Craigslist. Avoid barrels treated with creosote or unknown industrial chemicals; food-grade oak is safest for edibles. Here’s what you’ll actually need:
| Item | Qty | Notes | Cost Range |
|---|---|---|---|
| Used oak whiskey or wine barrel (half-barrel, ~22" diameter × 14" tall) | 1 | Check for intact hoops and no major cracks. Ask distilleries—they often give them away. | $0–$45 |
| 1/4" stainless steel screws (exterior grade) | 12 | Length: 1.5" — corrosion-resistant for outdoor use | $4 |
| 1/2" galvanized landscape fabric | 1 yard | Cut to fit interior base and sides | $6 |
| Drainage gravel (1/4" crushed granite) | 2 quarts | For bottom layer—prevents clogging and root rot | $5 |
| Exterior-grade wood sealant (oil-based or water-based acrylic) | 1 qt | Recommended: Ready Seal Natural Oak or Thompson’s WaterSeal Clear | $18–$24 |
Step-by-Step Instructions
1. Prep the barrel and remove metal hoops (if needed)
Most half-barrels retain their steel hoops, but if yours has loose or rusted bands, gently tap them inward with a rubber mallet and pry up one end using channel-lock pliers. Slide the hoop off carefully—don’t gouge the staves. Wipe interior with a damp rag to remove dust and old residue. Let dry fully before drilling.
2. Mark and drill drainage holes in the base
Flip the barrel upside down. Use a pencil to mark 5 evenly spaced holes in the curved bottom: one centered, plus four spaced 3" from center in cardinal directions. Drill straight down with a 1/4" bit—go slow to avoid splintering the oak. Vacuum out sawdust afterward.
3. Cut a removable bottom panel (optional but recommended)
Measure the interior base (typically ~20.5" × 13.5"). Cut a 3/4" pressure-treated plywood or cedar board to match using a jigsaw. Drill two 3/8" pilot holes near each short edge, then secure with four 1.5" stainless screws—this creates a clean, replaceable base for future root pruning or liner replacement.
4. Line the interior with landscape fabric
Cut a 24" × 24" square of 1/2" landscape fabric. Drape it over the interior, tucking snugly into corners and over drainage holes. Staple the top edge to the inner rim every 3" with a staple gun—pull taut but don’t stretch thin. Trim excess below the rim with scissors.
5. Add drainage layer and potting mix
Pour 2 inches of crushed granite gravel into the bottom—level with a small trowel. Then add high-quality potting mix (not garden soil) to within 3" of the rim. For heavy plants like dwarf citrus or lavender, mix in 10% perlite for extra aeration.
Tips & Common Mistakes
- Never skip the gravel layer—even with drainage holes, fine soil washes out and clogs openings over time.
- Avoid painting the interior: oil-based stains are safe, but latex paint traps moisture and accelerates rot.
- If your barrel wobbles, sand the bottom staves lightly on concrete until level—don’t shave more than 1/16" per pass.
- Don’t over-tighten screws into end grain (the barrel’s top/bottom edges); they’ll strip easily. Pre-drill all screw holes.
“Barrels with intact, tight hoops last 5–7 years outdoors untreated—but sealing extends life to 10+ years by blocking UV degradation and moisture wicking.” — Timber Preservation Quarterly, Vol. 42, 2023
Finishing Touches
Once assembled and planted, apply sealant to all exposed exterior wood—including the top rim and outer stave faces. Use a natural-bristle brush and work with the grain. One coat is sufficient for protection; two coats deepen color but aren’t necessary for longevity. Let cure 24 hours before moving into full sun. For contrast, try staining the top rim a warm walnut tone while leaving the body in natural oak—see our stain test results here.
Can I use a plastic or fiberglass barrel instead?
Yes—but skip drilling drainage holes. Instead, cut a 4" × 4" access panel in the side near the base using a utility knife, then line with fabric and secure with zip ties. Plastic holds moisture longer, so water only when the top 2" of soil feels dry.
How do I prevent the barrel from fading or turning gray?
UV exposure grays oak within 6–8 weeks. Reapply sealant every 12–18 months. For low-maintenance color retention, use a semi-transparent stain like Cabot Australian Timber Oil—it contains UV inhibitors and lasts 2+ years.
What plants thrive best in barrel planters?
- Herbs: Rosemary, thyme, oregano (drought-tolerant, shallow roots)
- Vegetables: Bush beans, cherry tomatoes, peppers (use 12"+ depth varieties)
- Flowers: Lavender, salvia, ornamental grasses (good airflow prevents mildew)
Avoid deep-rooted crops like carrots or parsnips—the shallow base restricts growth.
Do I need to elevate the planter off the ground?
Yes—especially on concrete or pavers. Place 1/2" ceramic tile spacers or pressure-treated wood feet underneath. This prevents water pooling under the barrel, which causes rot and attracts pests. We used 4×4 scrap blocks cut to 1" height—details on leveling feet here.
Can I grow edible plants safely in a whiskey barrel?
Absolutely—if it’s a food-grade barrel. Most U.S. distilleries use virgin oak charred with no chemical binders. Rinse thoroughly with vinegar-water (1:3 ratio) before planting edibles. Avoid barrels previously used for industrial solvents or pesticides—when in doubt, contact the supplier.
How often should I refresh the soil?
Every 2 years minimum. Over time, nutrients deplete and soil compacts. At replanting time, scoop out old mix, rinse roots, prune circling roots, and refill with fresh potting blend + 1 cup worm castings per cubic foot. Save healthy perennials like mint or sage to divide and replant.
With its solid oak construction and smart drainage, this barrel planter will anchor your patio or porch for years—not just seasons. Whether you’re growing basil for summer pasta or trailing ivy for curb appeal, it’s a build that balances function, beauty, and that quiet satisfaction of making something that lasts. Grab your gloves, find a barrel, and get started before the next rain shower rolls in.