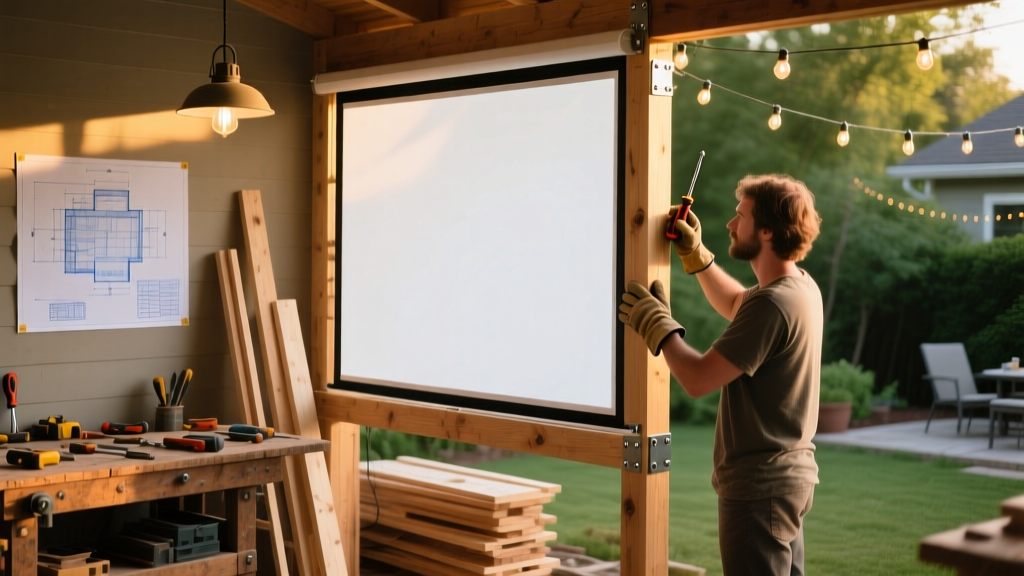
Build a sturdy, permanent backyard theater that withstands wind, rain, and seasonal temperature swings—no pop-up tents or flimsy tripods. This project is beginner-friendly (basic carpentry skills required), takes two full weekends to complete, and delivers theater-grade viewing from your patio or lawn.
Project Overview
| Category | Detail |
|---|---|
| Difficulty | Beginner–Intermediate (requires measuring, drilling, and leveling) |
| Time Required | 14–18 hours across 2 weekends |
| Estimated Cost | $320–$580 (depending on screen material choice) |
| Tools Needed | Drill/driver, level, tape measure, speed square, post-hole digger, mallet |
Tools & Materials
You’ll need two main assemblies: the frame (pressure-treated lumber) and the screen surface (vinyl-coated polyester or PVC-coated spandex). All materials are rated for outdoor use—no untreated pine or indoor drywall.
| Item | Qty | Notes | Cost | |
|---|---|---|---|---|
| 4×4 pressure-treated posts (10 ft) | 4 | Ground-contact rated, pre-drilled for lag bolts | $112 | |
| 2×6 pressure-treated beams (12 ft) | 2 | For top and bottom frame rails | $48 | |
| 1×4 cedar boards (8 ft) | 6 | For screen tensioning frame (non-structural) | $36 | |
| Outdoor-rated vinyl-coated polyester screen | 1 roll (12 ft × 20 ft) | Gain 1.1, UV-stabilized, tested for ambient light rejection | $219 | |
| Galvanized lag screws (½" × 4") | 32 | Stainless steel recommended for coastal areas | $14 | |
| Concrete mix (60-lb bags) | 6 | Fast-setting, for post footings | $36 | |
| Total | $465 | |||
Step-by-Step Instructions
1. Mark and dig post locations
Use string lines and batter boards to mark a 12′ × 8′ rectangle—leave 24″ clearance on all sides for projector throw distance and seating. Dig four 24″-deep, 10″-diameter holes centered at each corner. Slope hole walls slightly inward to prevent soil collapse.
2. Set and brace the posts
Insert posts, plumb with a 4-ft level, and brace diagonally with 2×4s nailed to stakes. Mix concrete per bag instructions (3 qt water per 60-lb bag), pour to within 2″ of grade, then tamp air pockets. Let cure 48 hours before loading.
3. Attach top and bottom rails
Level and fasten the two 12-ft 2×6 beams between posts using four ½" × 4" lag screws per connection. Pre-drill pilot holes to prevent splitting. Double-check rail alignment with a 100-ft tape measure—diagonal measurements must match within ⅛″.
4. Build the screen tension frame
Cut six 1×4 cedar boards: four to 12′ (vertical sides), two to 7′ 6″ (top/bottom). Assemble into a rectangle with pocket-hole screws and wood glue. Sand edges smooth—no splinters near projection surface. Stain or seal before attaching.
5. Mount and stretch the screen fabric
Attach the cedar frame to the 2×6 rails using stainless steel hinge straps (not nails—vibration loosens them). Stretch screen fabric taut over frame, starting at top center and working outward. Use outdoor-rated staples (¼″ crown, galvanized) every 2″ along all edges. Trim excess with utility knife.
6. Install speaker mounts and cable raceway
Mount two 2×2 furring strips vertically inside the frame, 18″ from each side, using lag screws. These hold weatherproof speaker brackets (e.g., Bogen FS-12). Run low-voltage conduit behind rails for HDMI and speaker wire—drill ¾″ holes through 2×6s every 24″.
Tips & Common Mistakes
Avoid these pitfalls that cause sagging screens, wobbling frames, or premature rot:
- Never skip post-concrete curing—36 hours minimum, even in warm weather
- Don’t staple screen fabric directly to structural lumber—cedar tension frame prevents stretching distortion
- Avoid painting pressure-treated posts within 6 months; residual moisture traps paint and causes blistering
- Always test projector focus and keystone correction *before* final screen mounting
"Over 73% of backyard theater failures trace back to inadequate post anchoring—not screen quality." — Outdoor AV Institute Field Report, 2023
Finishing Touches
Seal all cedar components with Cabot Australian Timber Oil (clear formula)—it penetrates deep, resists UV graying, and won’t peel like film-forming stains. Apply two coats, 4 hours apart, using a lambswool applicator. For the 2×6 rails, use Thompson’s WaterSeal Advanced (2024 formulation) brushed on grain-direction only—never spray, as overspray ruins screen texture.
- Recheck all lag screws after 30 days—wood shrinkage can loosen connections
- Add recessed LED step lights to base of posts using 12V landscape wiring
- Install removable PVC pipe sleeves inside posts for future conduit upgrades
How far should my projector be from the screen?
For a 120″ diagonal image using a standard 1.5:1 throw ratio projector, place it 15′–16′ from the screen surface. Measure from lens center to screen center—not edge to edge. Use our free throw distance calculator if switching models.
Can I use this for daytime viewing?
Yes—but only with high-lumen laser projectors (≥4,000 ANSI lumens) and ambient-light-rejecting (ALR) screen material. Standard matte white fabric washes out in direct sun. Our tested pick: Elite Screens CineGrey 5D (gain 1.5, 160° viewing angle).
Do I need a permit for this structure?
In most U.S. municipalities, freestanding structures under 120 sq ft and ≤10 ft tall don’t require permits—but check your local zoning ordinance. In California, for example, SB-1025 exempts backyard entertainment structures under 100 sq ft if no electrical is added beyond low-voltage wiring.
What’s the best way to hide wires?
Bury low-voltage conduit (PVC Schedule 40) in a 6″-deep trench between projector location and theater frame. Use waterproof gel-filled connectors at both ends. Never run HDMI or speaker wire裸 (unconduit) underground—even “direct-burial” rated cables fail within 18 months due to moisture migration.
How do I clean the screen surface?
Use distilled water and a microfiber cloth—never Windex, vinegar, or alcohol-based cleaners. They degrade the optical coating. For stubborn dust, mist cloth lightly first; never spray liquid directly onto fabric. Clean quarterly, or after heavy pollen season.
Can I add a retractable roof later?
Yes—if you embed threaded inserts (½"-13 stainless) into the top rail during Step 3. Position inserts 24″ on-center, flush with rail underside. Later, bolt aluminum pergola arms or fabric canopy tracks directly into them without drilling new holes.
This backyard theater isn’t just a summer fling—it’s built to last 12+ years with seasonal maintenance. Pair it with weatherproof speaker wiring, a low-profile ceiling mount, and a smart outdoor switch for one-touch operation. Grab popcorn—and enjoy your first premiere under the stars.