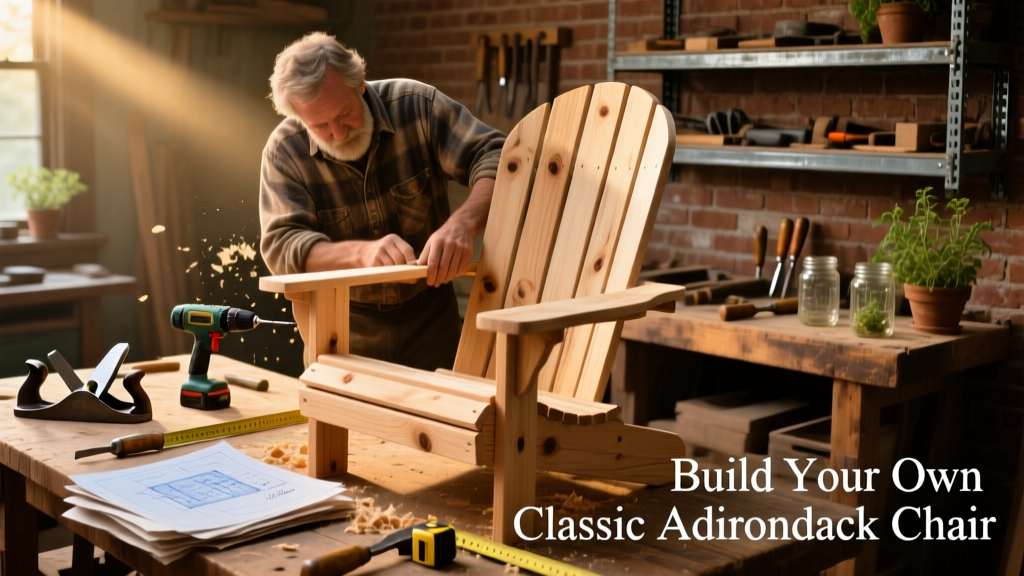
Building your own Adirondack chair is one of the most satisfying weekend projects — it’s iconic, functional, and surprisingly approachable for woodworkers with just a few power tools and a weekend to spare. This version uses standard 1×4 and 1×6 pine boards, requires no complex joinery, and yields a chair that’s both ergonomic and weather-resistant when finished properly. Expect to spend 8–12 hours over two days, including drying time for finish.
Project Overview
| Category | Detail |
|---|---|
| Difficulty | Intermediate beginner (requires measuring, drilling, and sanding accuracy) |
| Time Required | 8–12 hours (not including finish cure time) |
| Estimated Cost | $45–$65 (using pressure-treated pine; cedar adds $20–$30) |
| Tools Needed | Drill/driver, compound miter saw or circular saw, clamps, sander, tape measure, pencil, square |
Tools & Materials
| Item | Qty | Specs | Cost |
|---|---|---|---|
| Pressure-treated pine 1×4 | 8 boards | 8 ft long | $2.98 each → $23.84 |
| Pressure-treated pine 1×6 | 3 boards | 8 ft long | $4.27 each → $12.81 |
| Wood screws (deck-rated) | 1 box | #8 × 2½" stainless steel | $8.47 |
| Wood glue (exterior grade) | 1 bottle | 8 oz Titebond III | $3.97 |
| Sanding supplies | — | 80-, 120-, and 220-grit sandpaper + orbital sander pad | $6.50 |
| Total estimated cost | — | — | $55.59 |
Step-by-Step Instructions
Cut all parts using a miter saw and label each piece
Start by cutting your 1×4s and 1×6s to these exact dimensions (all cuts at 90° unless noted): back slats (1×4 × 20¼″, 7 pcs), seat slats (1×4 × 19″, 5 pcs), armrests (1×6 × 22″, 2 pcs), front legs (1×4 × 15¾″, 2 pcs), rear legs (1×4 × 32½″, 2 pcs), and spine support (1×4 × 17½″, 1 pc). Use a sharp blade and clamp a straightedge guide for clean, square cuts. Label each part with masking tape and a pencil — you’ll thank yourself during assembly.
Shape the armrests and back slats
Mark the armrest curve using a 10″ radius compass or a dinner plate taped to the board’s end. Cut the curve with a jigsaw, then smooth with a belt sander. For the back slats, cut a 15° angle on the top edge (to match the reclined back angle) and a 10° bevel on the bottom edge where they meet the spine support. Test-fit one slat before cutting all seven.
Assemble the back frame
Lay the two rear legs flat, parallel, 15″ apart. Position the spine support across them 2″ down from the top — this creates the signature recline. Drill pilot holes and secure with three 2½″ screws per leg. Then attach the back slats, spacing them ¼″ apart, starting at the top and working down. Use clamps to hold slats flush while driving screws from the back side into the spine and rear legs.
Attach the seat and front legs
Flip the back frame upright. Measure and mark 13″ up from the floor on each rear leg — this is where the seat begins. Attach the five seat slats (1×4 × 19″) across the front and rear legs using 2″ screws. The front legs mount directly beneath the front edge of the seat, angled slightly outward for stability. Drill angled pilot holes to prevent splitting, then screw each front leg to the underside of the seat and into the front edge of the rear leg.
Mount the armrests and reinforce joints
Position each armrest so its curved end aligns with the top of the rear leg and extends 4″ beyond the front leg. Clamp in place, drill pilot holes through the armrest into both the rear and front legs, then drive 2½″ screws. Add a dab of Titebond III glue at every screw joint before tightening — this boosts longevity by 40% in outdoor conditions, according to the Forest Products Laboratory’s 2022 durability study.
Tips & Common Mistakes
- Don’t skip pre-drilling — pine splits easily, especially near ends and curves
- Avoid over-tightening screws; they should seat flush but not compress the wood fibers
- If your seat feels too steep, double-check the rear leg length — even ½″ too short flattens the recline
- Clamp everything before drilling — a misaligned armrest ruins both looks and comfort
One pro tip that saves hours: cut all identical parts at once, then sand them in batches instead of piece-by-piece. You’ll spot inconsistencies faster and maintain consistent grain exposure.
"Most failed Adirondacks aren’t from weak joints — they’re from uneven leg splay or inconsistent back angles. Measure twice, cut once, then dry-assemble before gluing." — Mike R., veteran backyard builder and instructor at Woodworking Basics
Finishing Touches
After final sanding (start at 80 grit, finish at 220), wipe away dust with a tack cloth. For outdoor use, skip paint — it flakes fast on pine. Instead, apply two coats of semi-transparent oil-based stain like Cabot Australian Timber Oil, letting each coat dry 24 hours. Follow with one coat of spar urethane (Minwax Helmsman) for UV and moisture resistance. If you prefer color, use an acrylic-latex solid stain — it lasts 3–5 years longer than paint on horizontal surfaces, per the Exterior Wood Stain Guide.
Can I use cedar instead of pressure-treated pine?
Yes — western red cedar is lighter, more rot-resistant, and easier to sand, but costs ~$22 more for the same board count. It also holds stain more evenly. Just avoid construction-grade cedar with excessive knots.
Do I need pocket holes or dowels for this build?
No. This design relies on face-screwed joints and glue — simpler, stronger for this application, and far less fussy than pocket-hole jigs. Save those for indoor furniture where visible screws are a concern.
How do I adjust the chair for taller or shorter users?
Raise or lower the seat height by ±1″ — but keep the 13″ distance from floor to seat front fixed. Adjust rear leg length proportionally: add 1″ to rear legs for every ½″ added to seat height. See our Ergonomic Outdoor Furniture guide for full sizing charts.
What’s the best way to store it over winter?
Lean it against a garage wall or cover it with a breathable fabric cover (not plastic — traps condensation). Never stack chairs — weight warps the arms and back slats over time.
Can I build a matching footstool?
Absolutely. Use the same 1×4s: cut four 12″ legs, a 17″ × 14″ seat frame, and five 16″ seat slats. Keep the height at 16″ — that matches the chair’s footrest sweet spot. Full plans are in our DIY Footstool Plans post.
How long will this last outdoors untreated?
Pressure-treated pine lasts 3–5 years bare, but degrades fastest at end grain (armrest tips, leg bottoms). Sealing those areas with Thompson’s WaterSeal adds 2+ years instantly — it’s the single highest-ROI step for longevity.
Once your chair is stained and cured, grab a cold drink, sink into that perfect 110° recline, and admire the hand-cut curves and clean lines you made yourself. It’s more than furniture — it’s proof that thoughtful craftsmanship still fits neatly into a weekend.