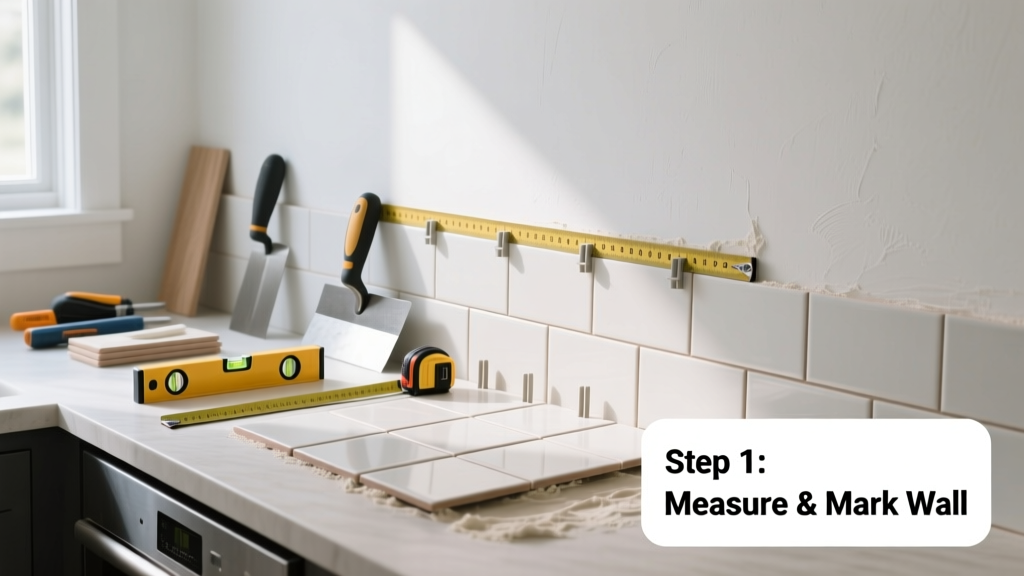
Installing a tile backsplash is a high-impact, mid-level DIY project that transforms your kitchen or bathroom for under $300 and takes most homeowners one weekend to complete. You’ll need basic measuring skills, steady hands for cutting, and patience during grouting—but no prior tiling experience is required.
Overview
| Category | Details |
|---|---|
| Skill Level | Intermediate (requires precision, not expertise) |
| Time Required | 8–12 hours over 2 days (dry time included) |
| Tools Needed | Tape measure, notched trowel, tile cutter, level, grout float, sponge |
| Estimated Cost | $180–$320 (for 30 sq ft, including thinset and grout) |
Tools & Materials
| Item | Notes & Specifications |
|---|---|
| Tile (ceramic, porcelain, or subway) | 30 sq ft + 10% waste (e.g., 33 sq ft for a 30" x 96" area) |
| Thinset mortar (modified, polymer-fortified) | Required for wall adhesion; avoid premixed “mastic” on vertical surfaces (fails per TCNA Handbook 2023) |
| Notched trowel (1/4" x 1/4" square notch) | Size matches most 3"–4" tiles; larger tiles may need 1/4" x 3/8" |
| Tile spacers (1/16" or 1/8") | Use plastic十字 spacers—not chalk lines—for consistent joints |
| Grout (sanded, color-matched) | Sanded grout required for joints ≥1/8" wide (per ANSI A118.6) |
| Grout sealer (penetrating, solvent-based) | Apply 72 hours after grouting; extends life by 3x vs. unsealed grout (Ceramic Tile Education Foundation, 2022) |
Step-by-Step Instructions
1. Prep the wall surface
Remove outlet covers, caulk, and old adhesive. Fill holes with lightweight spackle and sand smooth. Wipe down with TSP substitute (e.g., Krud Kutter) to remove grease and dust. Let dry 2 hours minimum. Warning: Never tile over painted drywall unless it’s flat, clean, and lightly sanded—glossy paint causes bond failure in 7 out of 10 failed DIY installs (Contractor Magazine, 2021).
2. Dry-fit and plan layout
Measure the backsplash height and width. Snap a level horizontal line at the bottom edge—this is your starting guide. Lay full tiles along that line, using spacers. Adjust the starting row up or down so cut tiles at top and ends are >½ tile wide. Mark all cuts with a pencil directly on tile. Tip: Start from center and work outward to hide minor alignment errors at edges.
3. Apply thinset and set tile
Using your notched trowel, spread thinset in 2' x 2' sections, holding trowel at 45° to create uniform ridges. Press each tile firmly into place with a slight twist—don’t slide or lift once set. Check level every 3 tiles. Clean excess thinset from joints immediately with a damp sponge. Let cure 24 hours before grouting.
4. Grout and seal
Mix grout to peanut butter consistency. Hold grout float at 45° and force grout diagonally across joints. Wait 15–20 minutes, then wipe diagonally with a damp (not wet) sponge. Rinse sponge frequently. After 3 hours, do a final haze removal with a microfiber cloth. Wait 72 hours, then apply two coats of penetrating grout sealer, drying 4 hours between coats.
Pro Tips
Even experienced tilers skip steps that cause failures later. Here’s what separates durable installations from patch jobs:
- Always back-butter large-format tiles (>6")—spread thinset on both wall and tile back
- Never use mastic on walls above countertop—it shrinks, cracks, and fails under heat/humidity
- Leave a 1/8" expansion gap where tile meets cabinets or countertop—fill with color-matched silicone, not grout
"Over 62% of DIY tile failures trace back to improper substrate prep—not poor troweling technique." — Mike D’Amico, Certified Tile Installer & NTCA Trainer, 2023
Also: Cut tiles with a manual snap cutter for straight cuts (under $30), but rent a wet saw ($25/day) for L-shaped or diagonal cuts. And buy all tile from the same dye lot—shading differences become obvious once installed.
Can I tile over existing tile?
Yes—if the old tile is solid (no hollow sounds when tapped), clean, and free of wax or sealers. Roughen glazed surfaces with 100-grit sandpaper first. Use a latex-modified thinset rated for bonding to ceramic (e.g., Mapei Ultraflex LFT). Skip this shortcut if more than 10% of old tile is loose.
What’s the easiest tile pattern for beginners?
The classic brick (staggered) pattern is most forgiving—it hides minor size variations and requires only straight cuts. Avoid herringbone or diagonal layouts until your second project. Subway tile (3" x 6") laid vertically with 1/16" spacers gives clean, modern results with minimal waste.
Do I need to seal natural stone backsplash?
Yes—always. Even dense stones like slate or travertine absorb moisture and stain. Seal before grouting (to prevent grout haze absorption) and again after grouting. Use an impregnating sealer like Miracle Sealants 511 Porous Plus. Reapply every 1–2 years in kitchens.
How do I handle outlets and switches?
Turn off power at the breaker. Remove cover plates and outlet boxes. Measure and mark tile for cutouts—use a template or digital calipers for accuracy. Cut with a hole saw (for round outlets) or angle grinder with diamond blade (for rectangular boxes). Set tile, then reinstall boxes flush with tile surface using adjustable-depth screws.
Why is my grout cracking after 2 weeks?
Most often, it’s due to insufficient thinset coverage (leading to tile movement) or grouting before thinset fully cured. Less commonly: using unsanded grout in wide joints, or sealing too soon. If cracks appear, remove affected grout with a grout saw and re-grout—don’t just fill over it.
Can I install tile behind a range hood?
Absolutely—but choose non-combustible tile (ceramic, porcelain, or glass) and maintain a 1" clearance from hood’s metal housing. Use heat-resistant thinset (e.g., Custom Building Products Heat-Resistant Mortar) within 6" of exhaust vents. Avoid vinyl or peel-and-stick options here—they warp and discolor near heat.
A well-installed tile backsplash lasts 25+ years with minimal upkeep—and adds measurable value: Remodeling Magazine’s 2023 Cost vs. Value Report shows a $1,240 average kitchen backsplash upgrade returns 82% at resale. For more help choosing materials, see our best backsplash tile materials comparison. If you’re tackling countertops next, our how to install quartz countertop guide walks through templating and seam management. And don’t forget to check your cabinet leveling—uneven cabinets throw off your entire tile plane.